Sharp X68000 Super restoration part 0
Related posts
The PSU whodunnit mystery
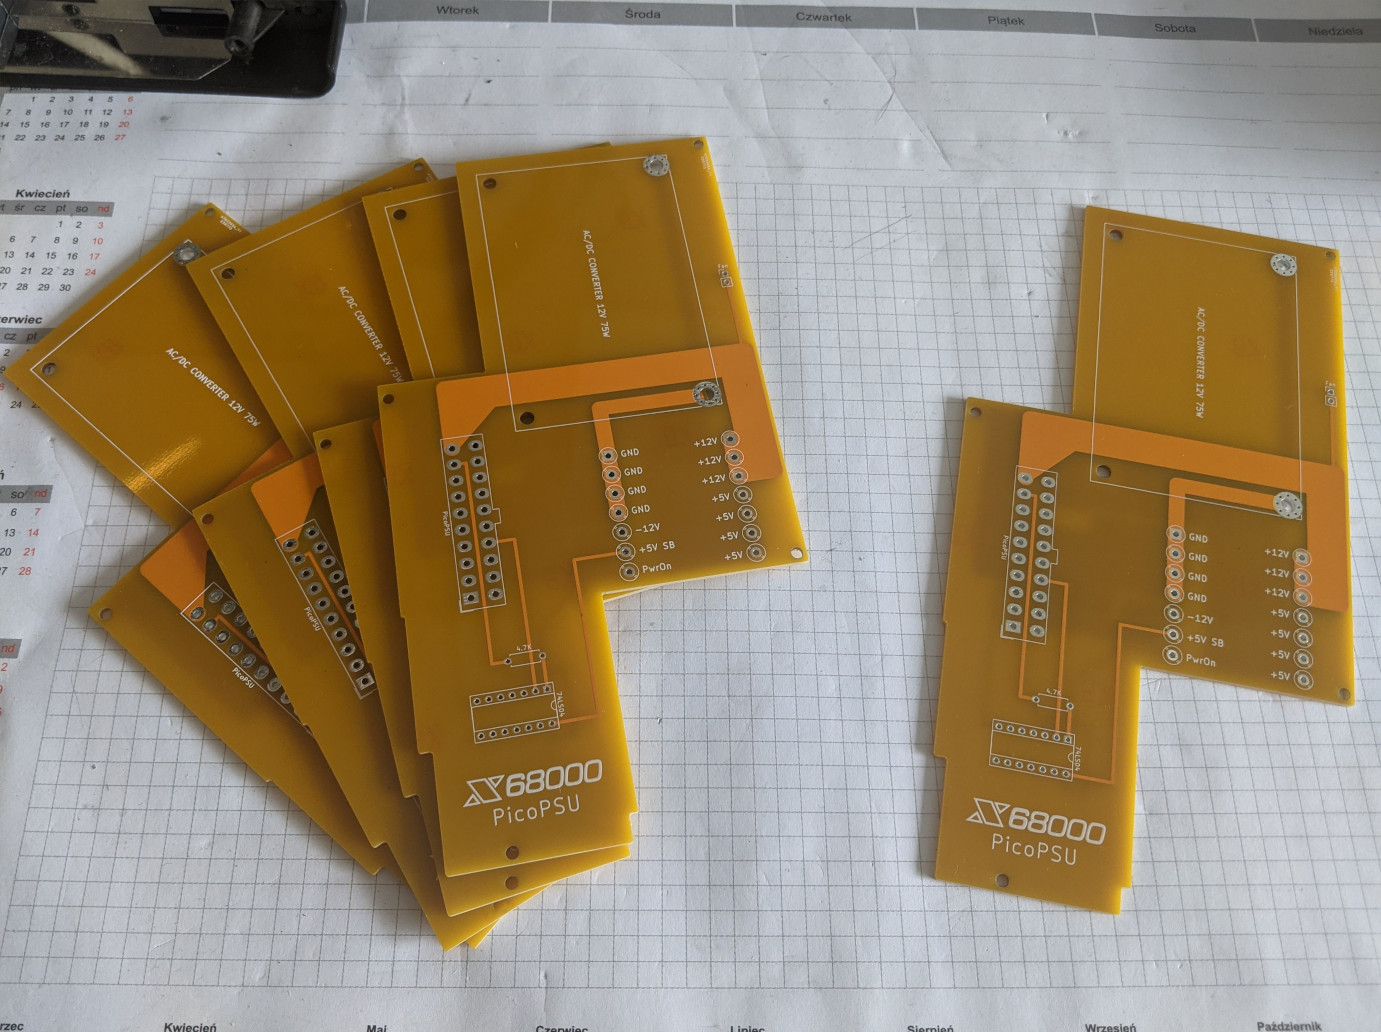
To have a working computer, we need power. As mentioned in the initial post the original PSU is busted. I've decided against trying to fix it and instead started looking for other, more reliable solutions. Quickly I stumbled upon this neat little project by mattsoft that makes it possible to retrofit a Pico PSU-based solution into the original, "tetris shaped" PSU's case. Ordered the PCB and parts from the BOM, and after a few weeks, I was ready to go. The lightning bolts of power from JLCPCB came first:
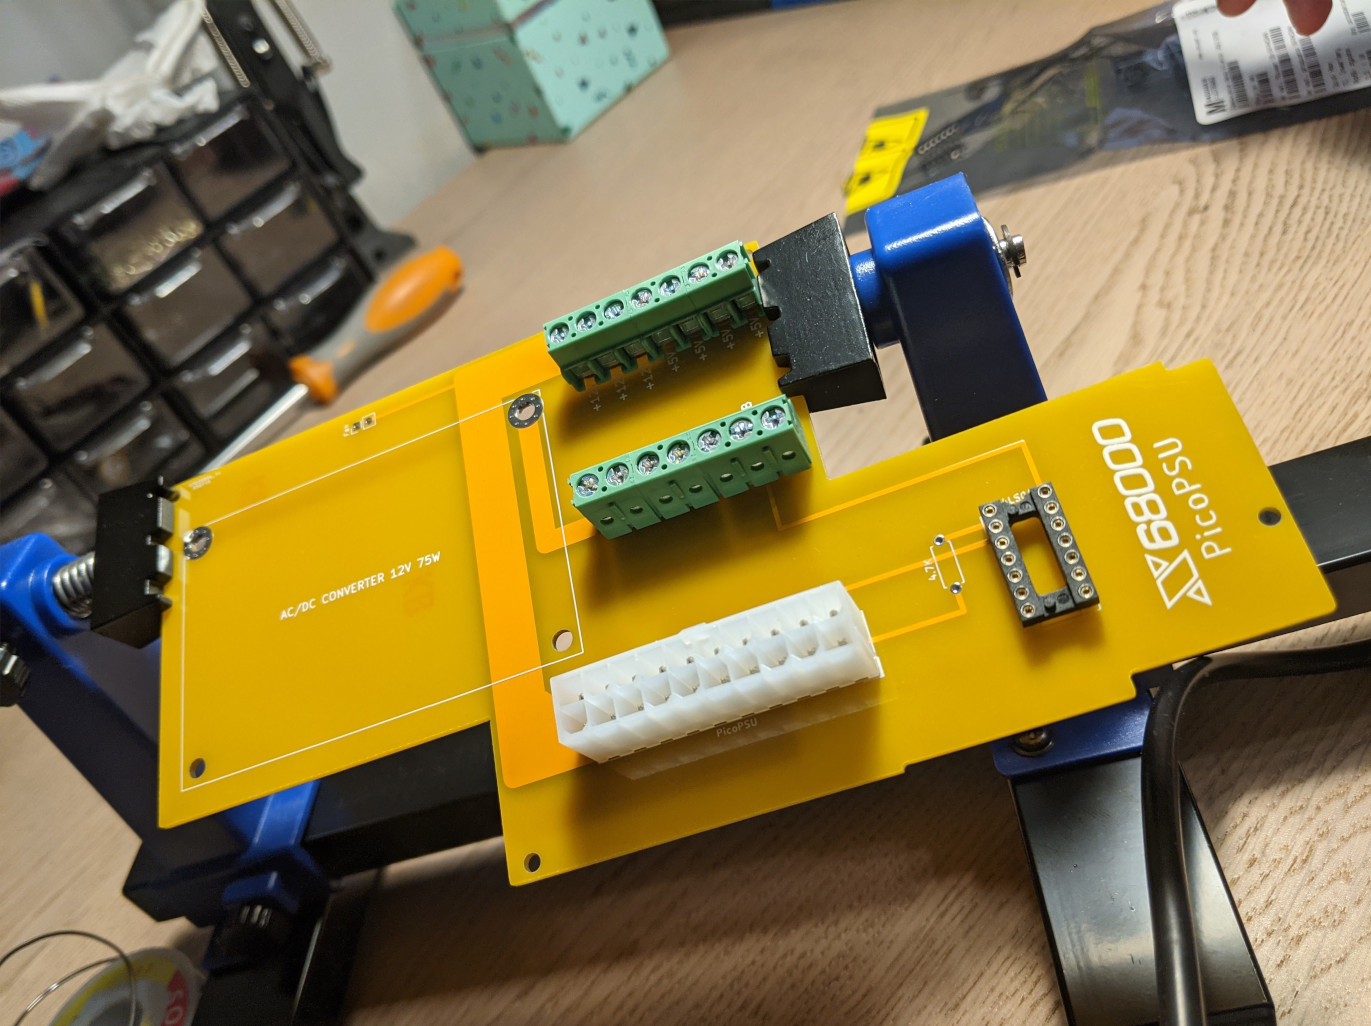
Oftentimes Pico PSUs are powered by external bricks, but in my case I wanted something looking as original as possible, so decided to put the AC/DC 12V converter directly inside the power supply and feed its output into the Pico, which would generate values required by the computer. As you can see, the converter takes most of the space, and the rest of the board is very simple:
I was able to snip the power connectors from the original PSU. The cables are color-coded and differ between models, but for Expert/Expert II/Super/XVI/030 it goes like this:
| red (thick) | +5V |
| black | ground |
| red (thin) | +5V standby |
| yellow | power on |
| blue | +12V |
| gray | -12V |
Take note that there are in fact two connectors - the bigger one connects to the bottom daughterboard, and the small one with two pins goes to the main board. By the way, the small connector is supposed to go from one side of the case to the other and it's a pain to put it through its dedicated hole at the bottom of the case, be careful to not yank it too hard and not cut yourself with the shielding. But when you have both of them figured out, you can connect them to the terminals on the PSU PCB:
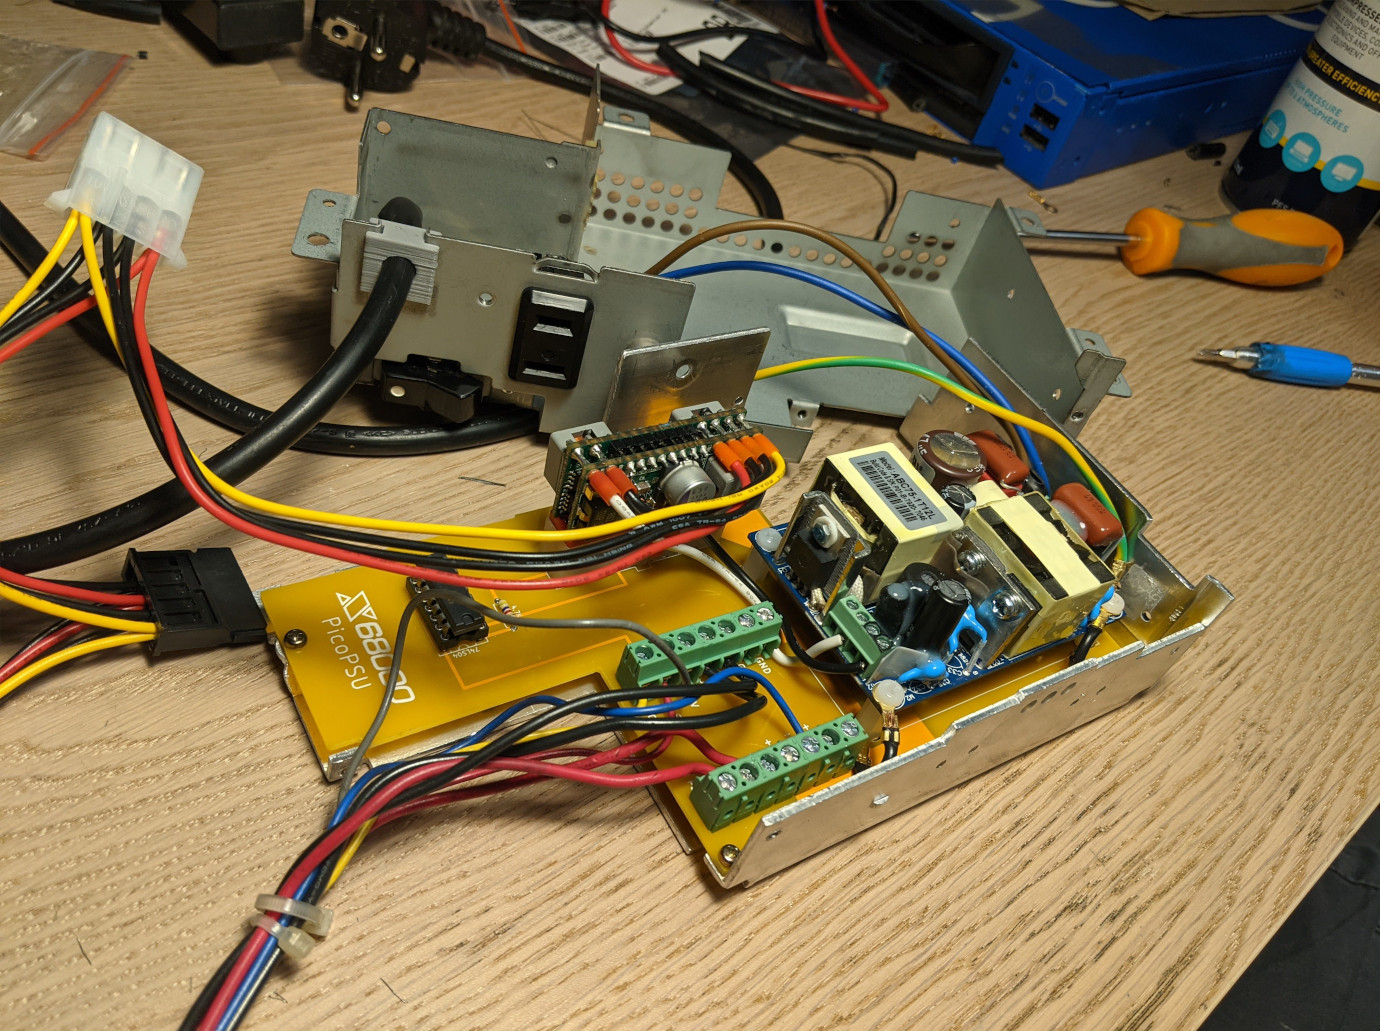
But that's not all, there are also another two, smaller, three-pin connectors - one for the floppy drives and one for the SASI/SCSI hard drive (if you have it). The thing about them is that they need to be connected to the Pico PSU directly, not via the terminals fed from the ATX molex, there's just not enough amperage there. You can see where they are supposed to go in the pic above, right where the big molex cable is sticking out right now. The pinout for these connectors looks like this:
| red | +5V |
| blue | +12V |
| black | ground |
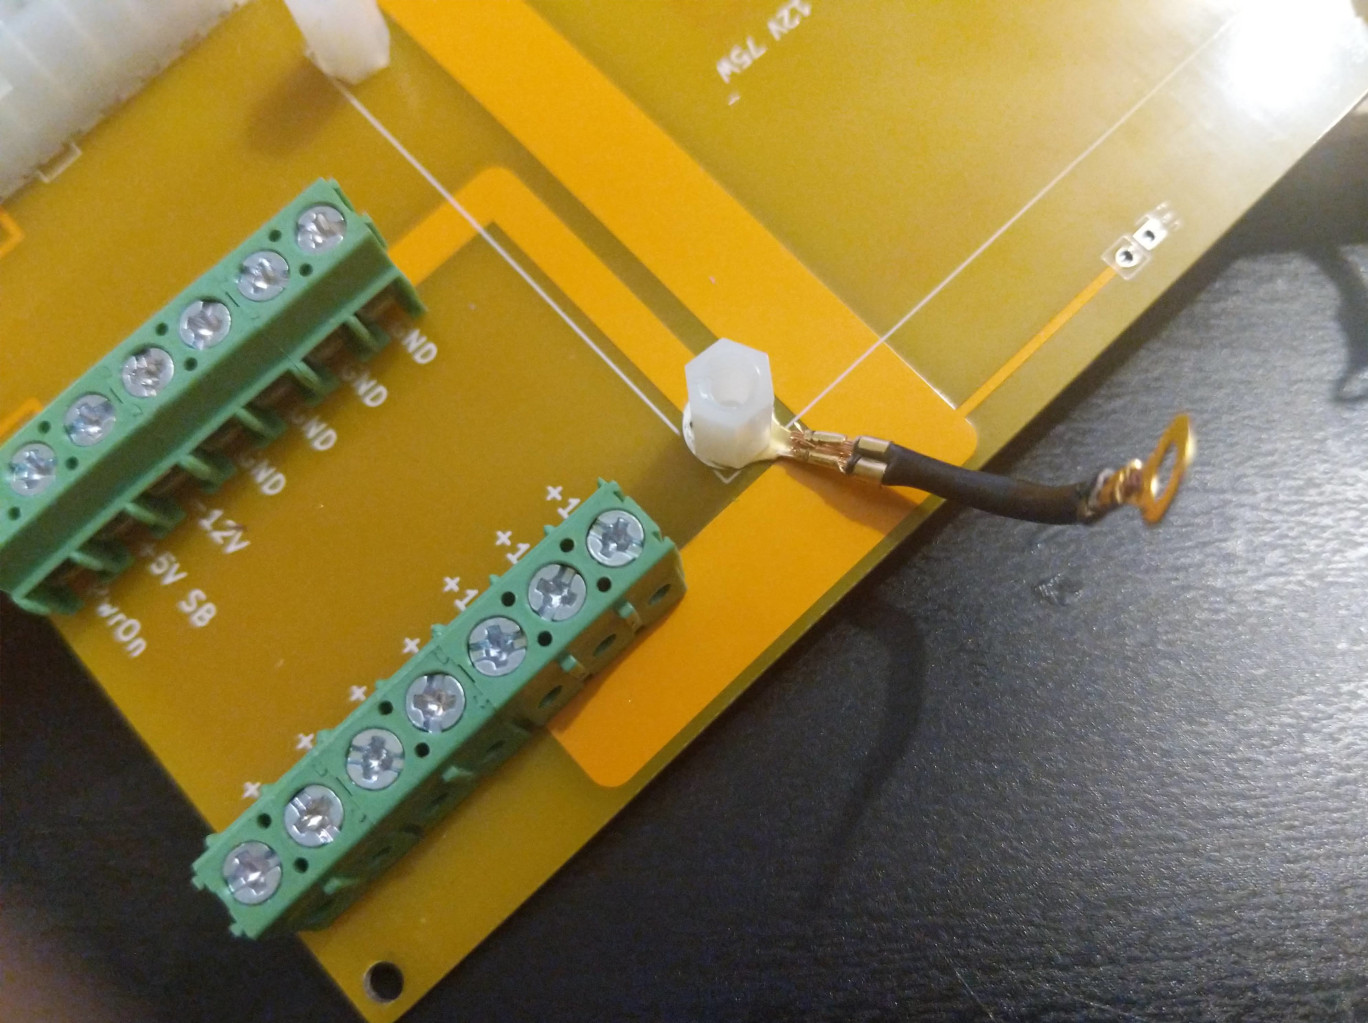
And in the end, this whole thing needs a new cable. The original uses a two-prong, Japanese-style power cord that I obviously can't use in Europe as it is. So instead I opted for a cable with a traditional, grounded shuko plug. If you are going to do the same, be sure to connect the board's and AC/DC converter's grounds and then connect it with the cable's ground. The easiest way to do it is by using metal spacers while mounting a converter on the board. I only had plastic ones, so had to do this little contraption instead (do not recommend, partially for a reason that will be obvious in a second):
After soldering and screwing everything together, it does indeed look rather tidy! But does it work? Well, time for a quick smoke test aaaand... nothing. The first Pico PSU I've got didn't want to wake up for some reason. Standby +5V was here, but no matter what it didn't want to wake up. I assumed it was broken. Now, after some time passed, it got tested, and looks like I was wrong and it's innocent. I have an idea why it was misbehaving, but it's related to another X68k issue I am going to talk about in the next post. Anyway, after a week I got another Pico, replaced it, and... still nothing. Well, not exactly nothing. The converter was emitting quiet, whiny beeps. So now it's shorting? My first reaction was to blame the new Pico (you can tell I am a tad paranoid about these tiny ITX PSUs...), but checked it and it was fine, of course. So I started taking the whole PSU apart, piece by piece. There was definitely a short between 12V and the ground somewhere on the board! But where? The SN74HC04N inverter was fine, the terminals were properly soldered, and the converter itself was doing fine on its own too... But the short was there, clear as day.
After two hours of looking my mental state was getting very similar to Chuck's from the Better Call Saul final episode of season 3

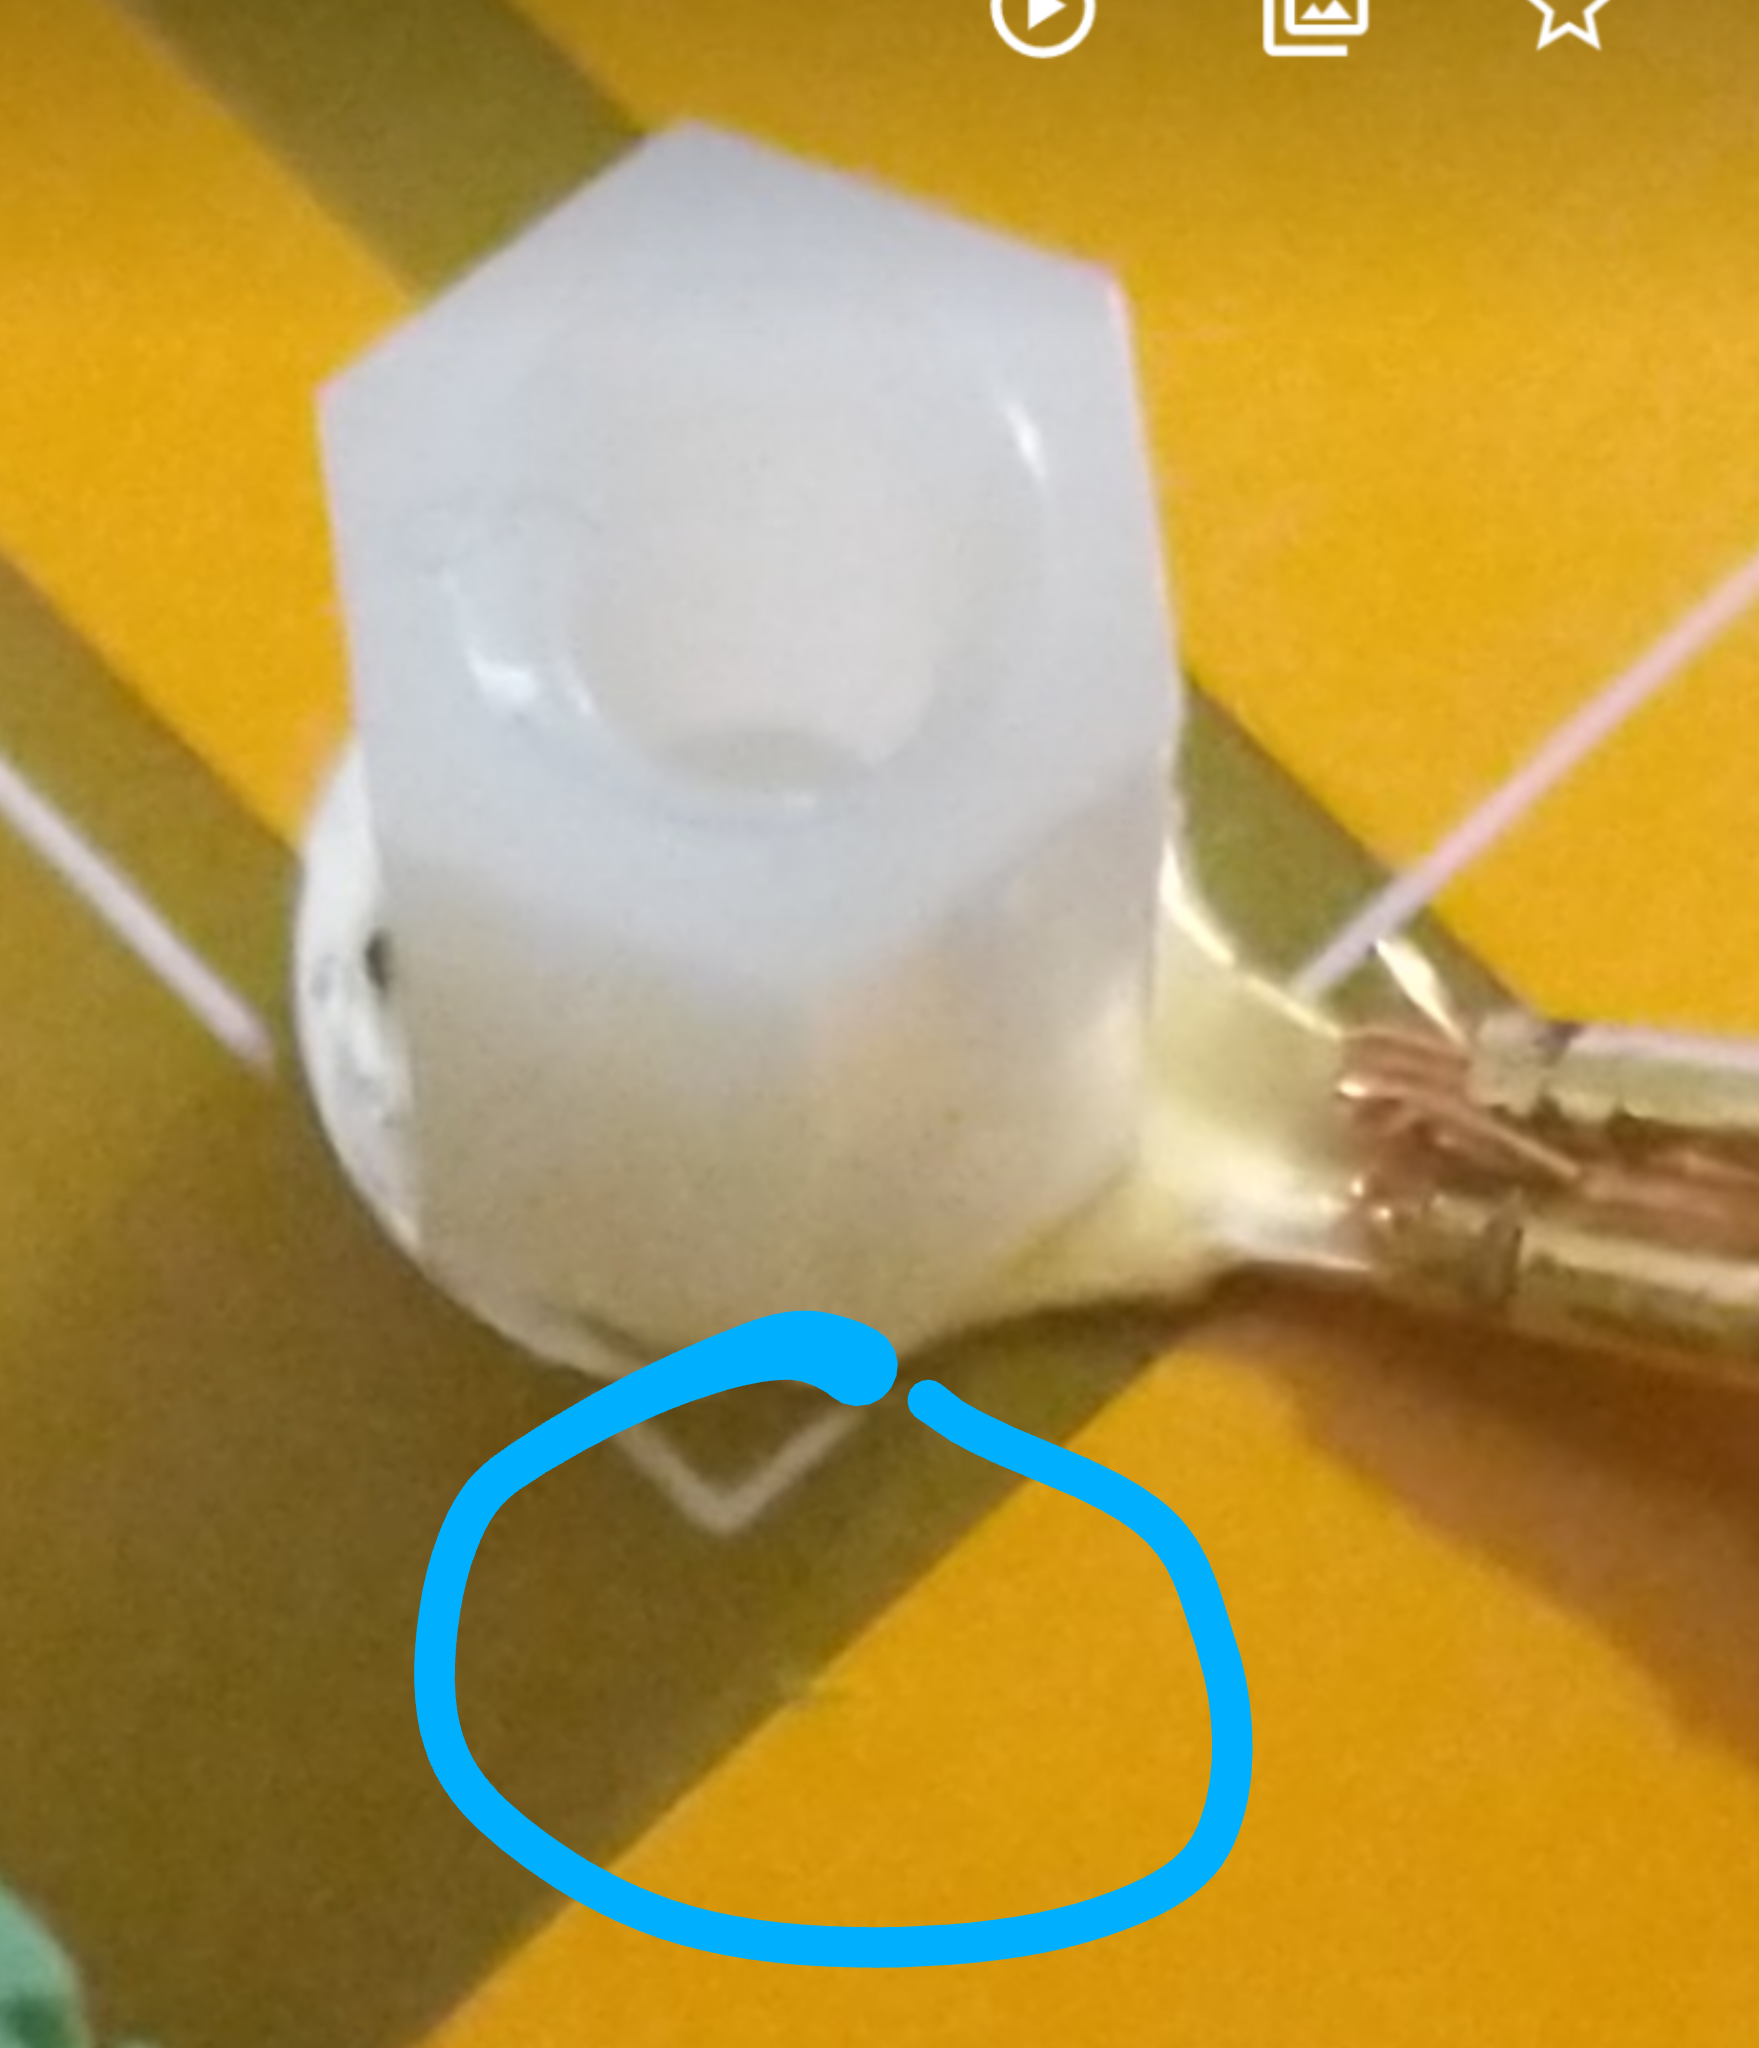
But then I decided to take the whole converter out of the board (at that point the only thing that was still in place), and while doing that, I finally saw it. The tiny, tiny scratch on the 12V plane, hiding under one of the eye ends in my grounding contraption. My phone camera isn't doing it justice, but zoom a bit on a previous picture and you can see it:
A few minutes of hysterical giggling later I fixed it and of course, everything started working fine. Finally!
Power on
After making sure the PSU isn't going to blow up, it was time to finally connect the freshly recapped X68000 and see what happens. We (polprog was with me for this big day) didn't have high expectations, but after some quick checks with the oscilloscope, we confirmed that the computer is at least now doing something. That something turned out to be something much better than we thought because when we managed to hook it up to my OSSC, this is what we saw!
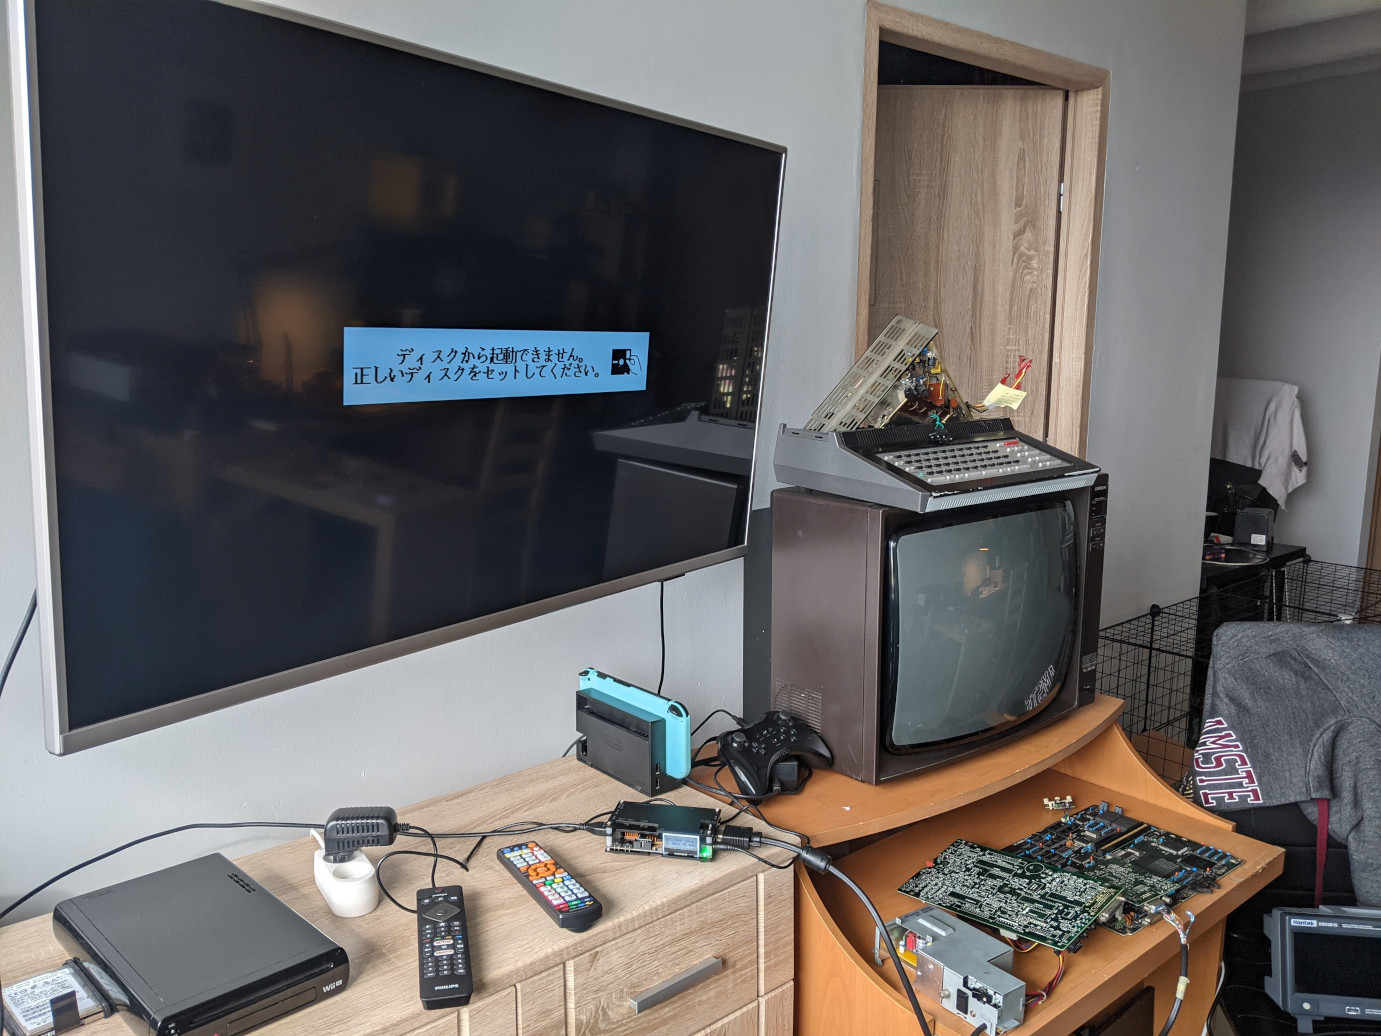
Even not knowing Japanese, you can tell it's a great sign. But just to be thorough, it says:
「ディスクから起動できません。
正しいディスクをセット セット。」
Which loosely translates to (as you can imagine):
"Can't boot from the disc, please insert the correct disc."
What now?
Sadly that's as far as I went for now. Day after taking this picture my OSSC decided it was time to die. Luckily I remember how the RGB output was looking like on the scope, so I can at least make sure it still works when I am debugging other things. What other things, you'll ask? I noticed a problem with the soft power switch circuit, so that's one thing. And a week ago I got some actual boot discs, so I can start testing the floppy drives after I'll clean them.
This computer is definitely a project, but I am so relieved to see it at least boots up fine!
/(≧ x ≦)\